
Practically everyone needs some kitchen skills. This includes young students who live on their own and parents who have families to feed. There are times when preparing meals is easy and quick but sometimes it can take a long time and a lot of effort. Did you know there are some tricks that you can do to make cooking easier? Whether you’re a beginner cook or a master chef, these cooking hacks are guaranteed to make preparing meals so much easier. Keep reading to know how you can expand your kitchen skills. This might just be what you need to level up your cooking.
Cooking Hacks That Make Preparing Meals Much Easier
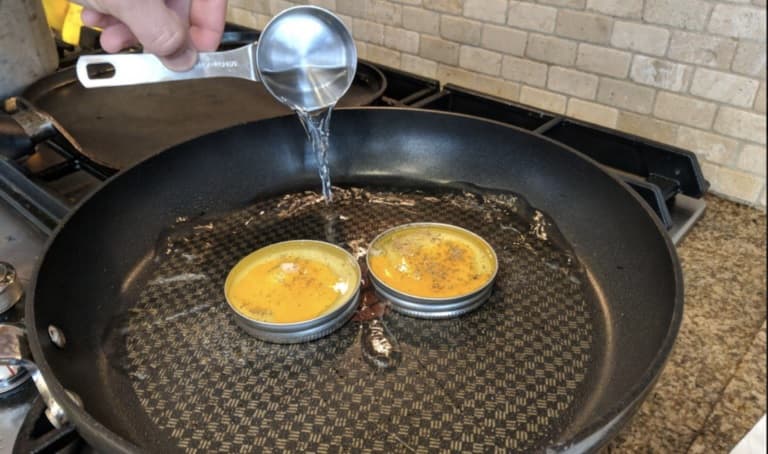
Cooking Eggs
You can cook eggs in a very original yet totally amazing way by doing it in a pan that has water and mason jar lids. This method is particularly popular among the keto diet fans, but everybody would definitely benefit from doing it! Heat your frying pan, put the mason jar lids in it, and crack the eggs in the lids. Crack the yolks, season, and after about one minute of cooking, put 1/4 cup of water in your pan. Cover the pan and let the eggs cook for 3 minutes. The eggs will come out delicious and perfectly round – perfect for English muffins or as “bread” for a sandwich!
Cooking Eggs
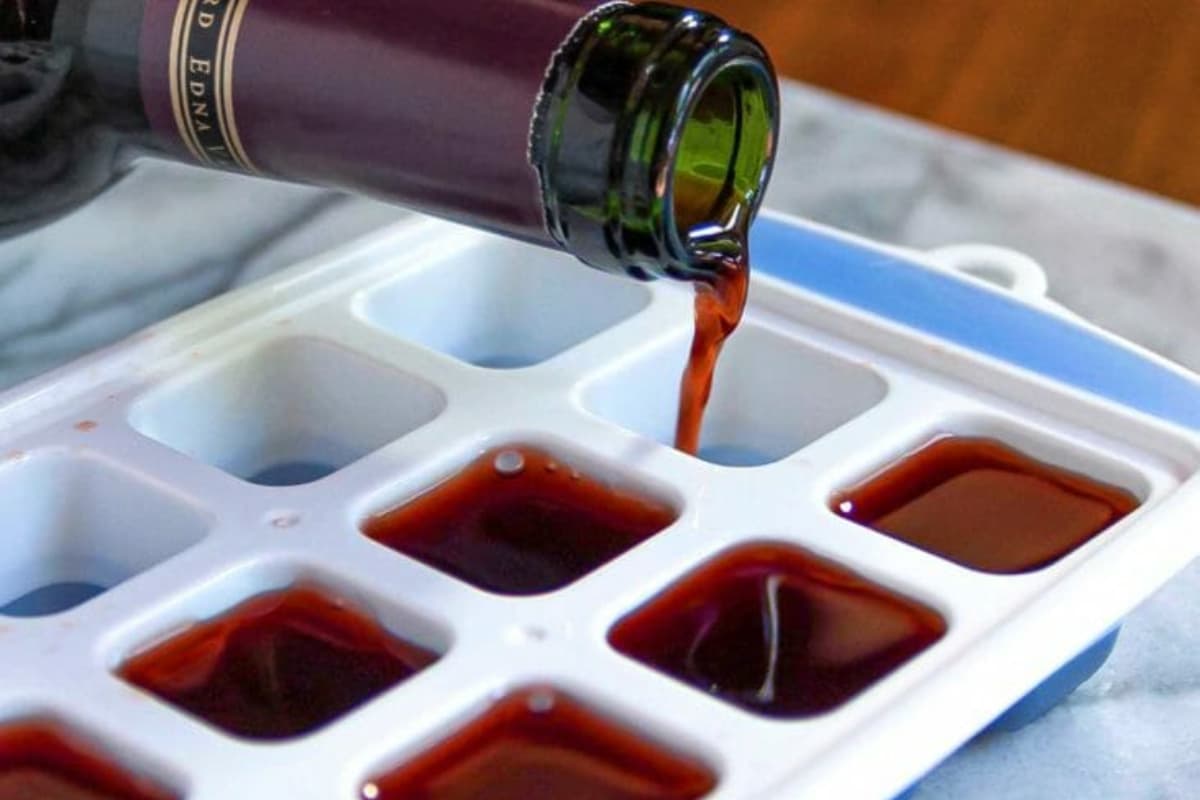
Freezing Leftover Broth Or Wine
If you use broth or wine in cooking, then you know only too well that you are often left with liquid that you are unable to use in a dish. You can throw the excess wine or broth, or store it in the fridge, though it could go bad before you would have a need for it again. There is another solution. Instead of letting all that excess liquid go to waste, place it in an ice cube tray before popping it in the freezer. When you have to use it, pop out a few of the frozen cubes then add them to your pot. The liquid will be as good as the first time you opened it, not to mention you will have better control of how much liquid to use as you know the rest will not go to waste.
Freezing Leftover Broth Or Wine
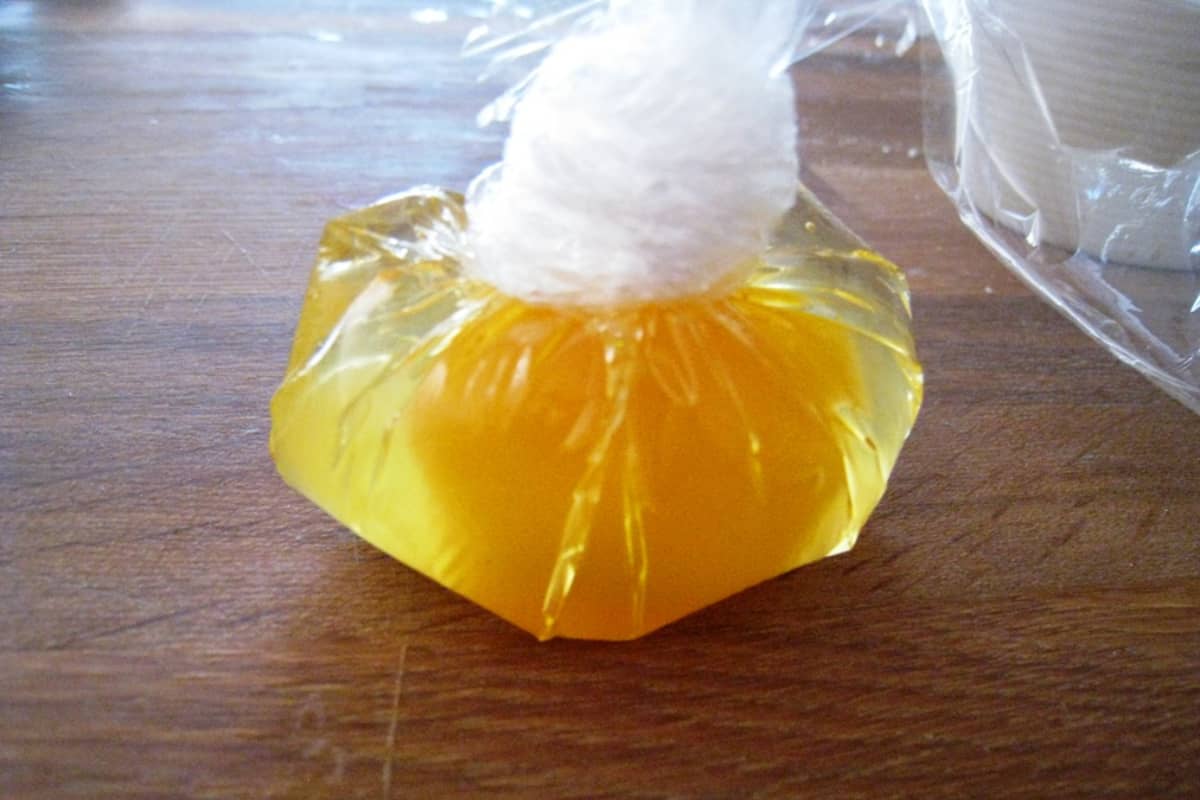
Poaching Eggs
The scourge of many home cooks – the poached egg. You know the egg should be cracked into boiling water and you should wait for it to cook. However, what often happens is the egg disintegrates into the water, and you are left with some messy egg-ish product. To solve this, use this trick. Put plastic wrap in a small cup, spray the plastic with nonstick cooking spray, and crack the egg into it. Tie the plastic closed and drop each of the plastic-wrapped pouches in hot water, allowing the egg to cook. When the egg is done, snip off the plastic wrap and you will have a perfect, poached egg.
Poaching Eggs
Ripening Food
Have you brought home some fruits only to realize they are not ripe enough to eat? You can wait for them to ripen, but you can also speed the process up with a paper bag. Place the unripened food inside a paper bag and then fold it closed. The ethylene gas inside the bag will be trapped, resulting in the fruits maturing more quickly. Make sure to check the fruit fairly regularly since leaving it in the bag for too long might give you rotten fruit!
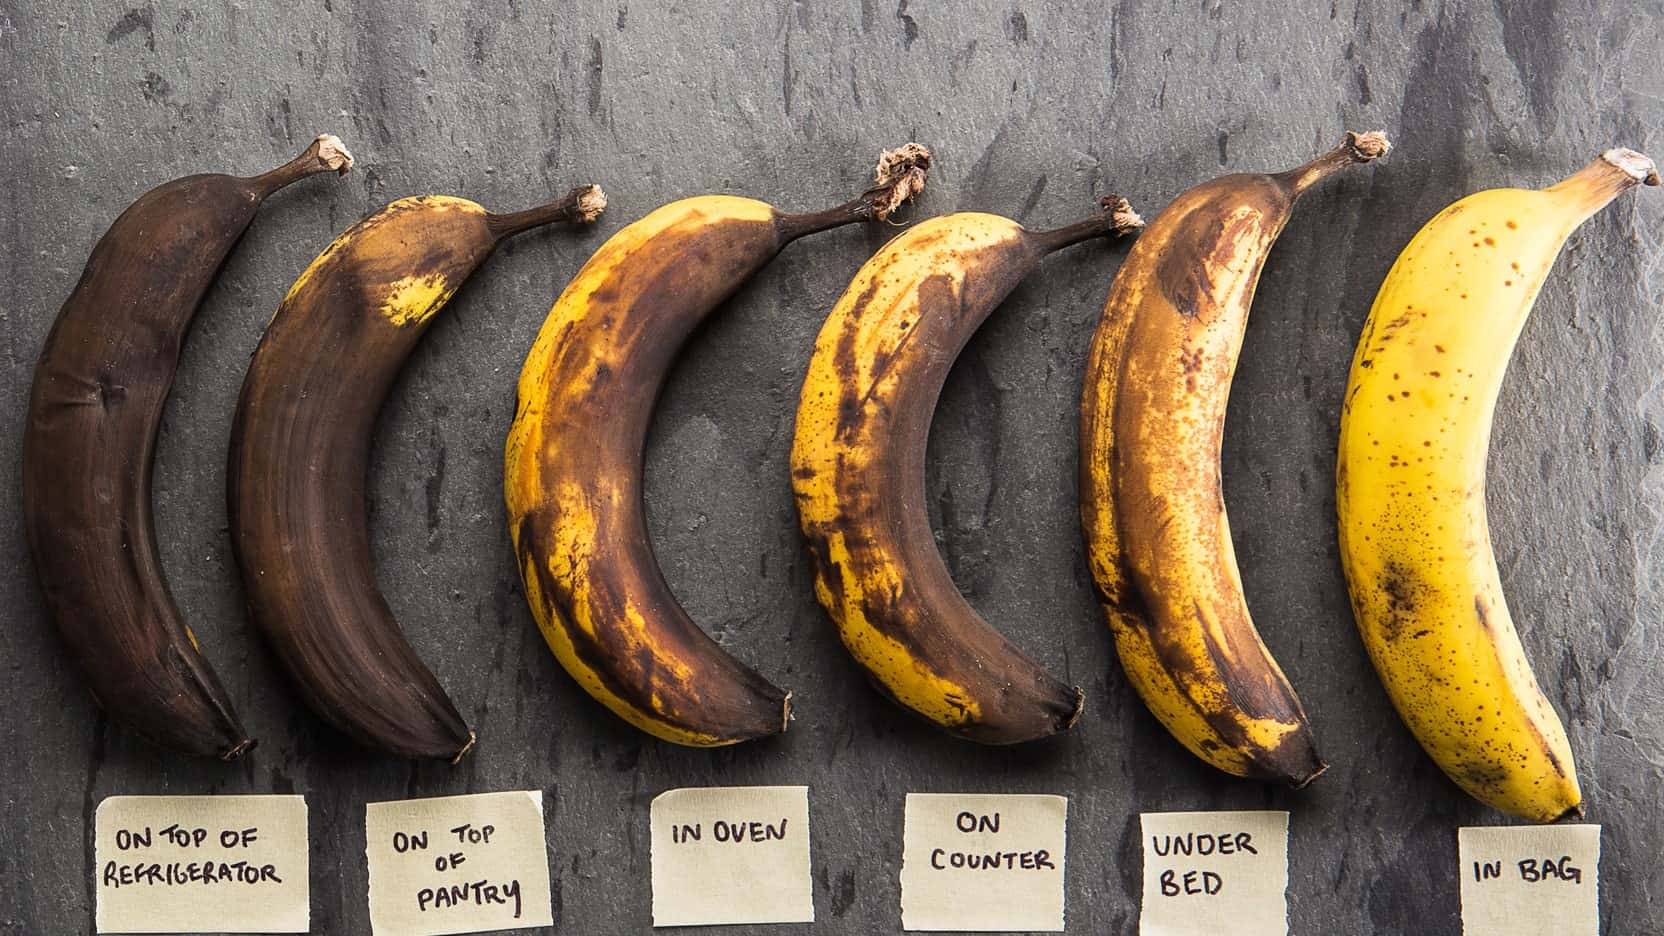
Ripening Food
Checking Ripeness Of Avocados
It is quite difficult to tell when an avocado is ready to eat. You can take a guess and cut into an avocado that is potentially under-ripe – or you can check the stem to see how ripe the fruit is. If it is easy to pull the stem back and you see a green interior, the avocado is perfect for eating. If the stem is difficult to pull away, the avocado is not ripe yet. If you pull the stem back and you see the inside is brown, the fruit is almost dead.

Checking Ripeness Of Avocados
Preheating The Pan
If you look at recipes, every professional says you should preheat the pan before cooking. If you do not preheat the pan, the food will still cook, so this step can be easily ignored. However, preheating the pan guarantees your food cooks more evenly and quickly than it does if you toss it straight onto a cold pan. Preheating the pan for around three minutes before adding the ingredients is already enough.
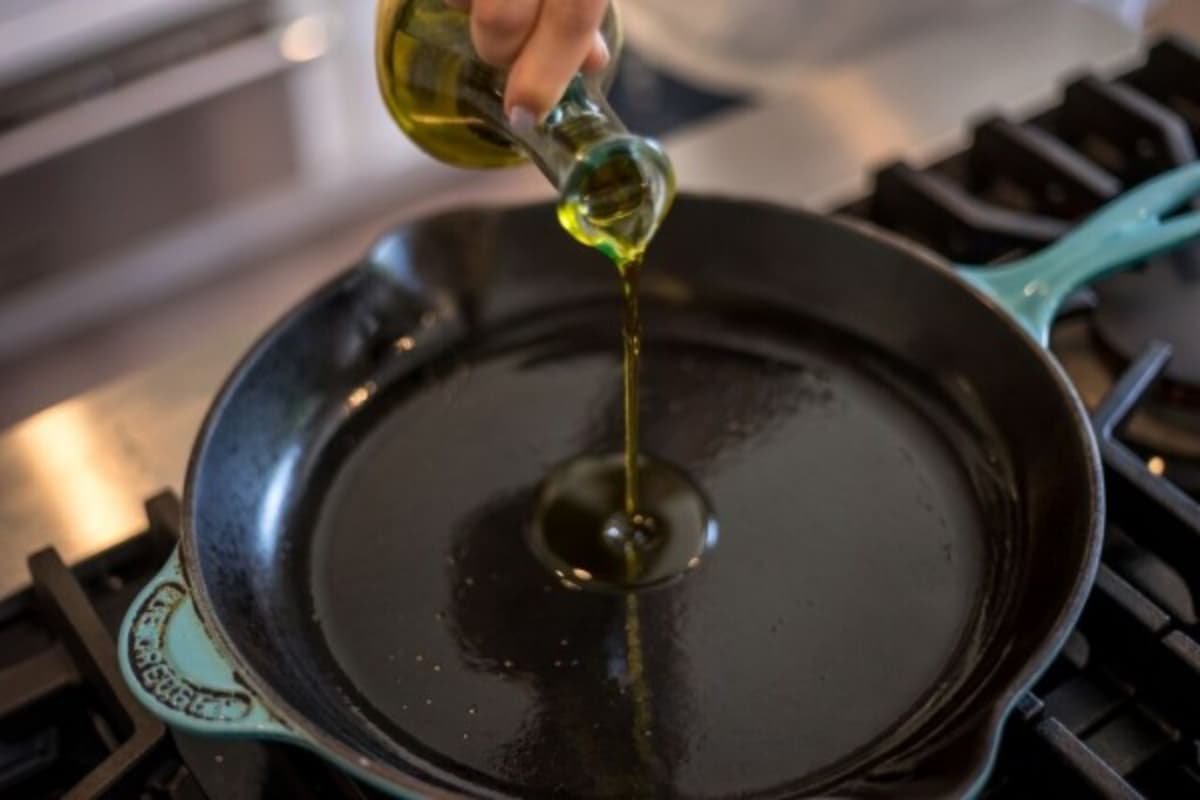
Preheating The Pan
Brushing Fish With Mayonnaise
Have you ever tried cooking fish fillet on the grill? Chances are it broke apart and ended up in tiny and unappetizing pieces. Fish is fragile food, so keeping fillet in one piece from the grill to a plate is quite a difficult task. Thankfully, the solution is easy. Brush your fish with a little bit of mayonnaise before you throw it on the grill. The fish will not stick to the grill because of the mayonnaise. A thin coating will not affect the flavor of the fish but will encourage even browning.
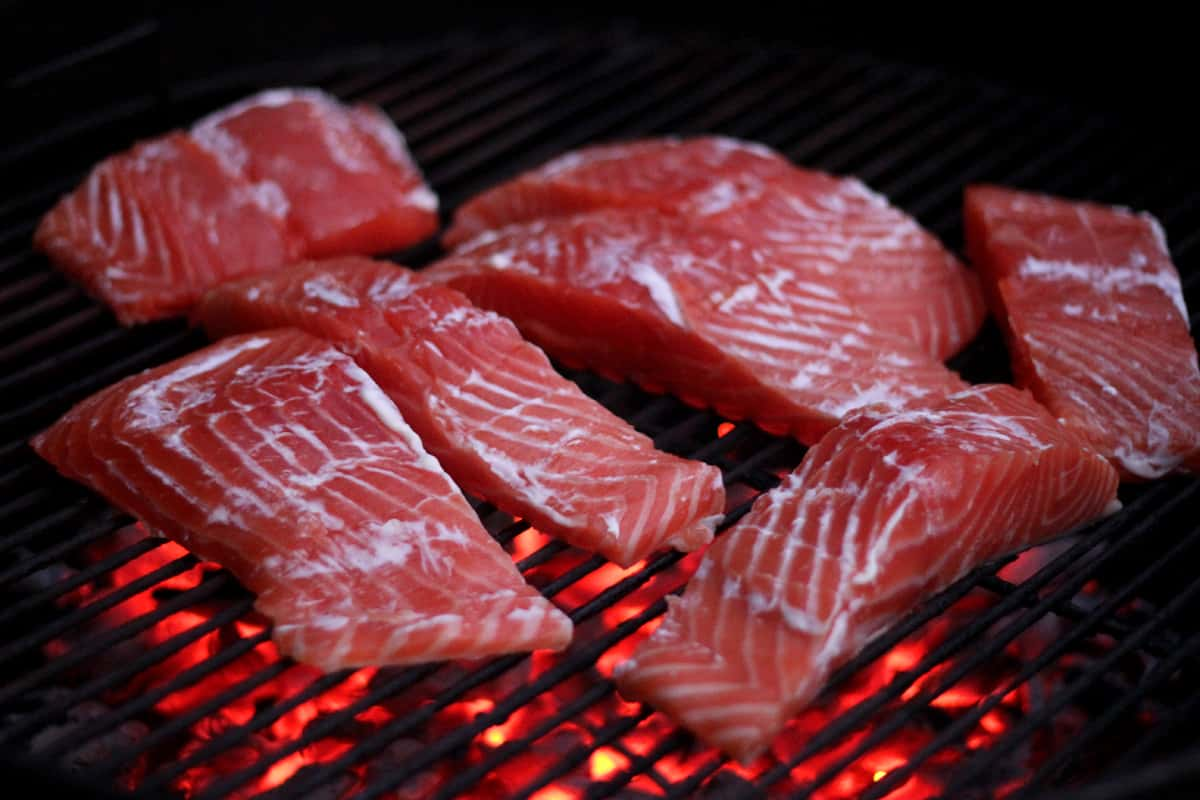
Brushing Fish With Mayonnaise
Peeling Potatoes
Peeling a batch of potatoes is not only time-consuming but also quite tiring as you have to scrape the skin off of each potato. However, there is no need to pull out your trusty peeler. For this trick, start with boiling water in a pot. Then, use a knife to trace a small line around the center of a potato. Put the entire bunch of potatoes in the pot to simmer in water for fifteen minutes. Once the time is up, place all the potatoes in a bowl of ice water. Once they have cooled down, you will be able to easily slide the peel off and continue with your cooking.
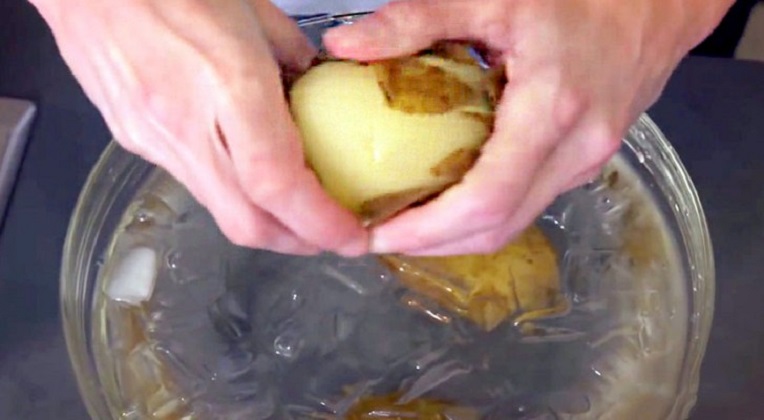
Peeling Potatoes
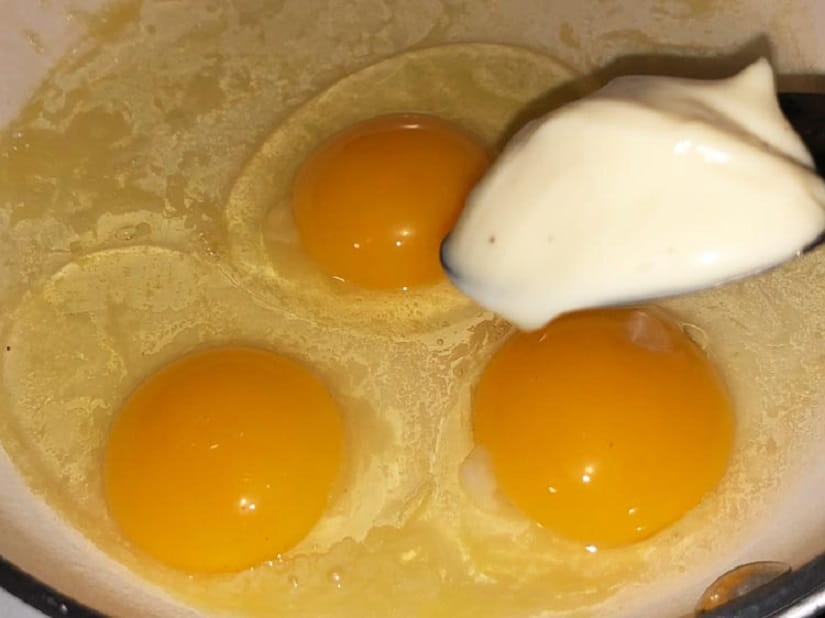
Making Scrambled Eggs
Scrambled eggs that are light, fluffy, and creamy are the ultimate dream. Most cooks add a little cream or milk to their egg mixture so that their eggs remain moist and rich. However, mayonnaise might be just what you need to perfect scrambled eggs. Instead of milk, add one spoonful of mayo to your next scramble. The mayo has enough fat to give eggs that fluffy texture, but the small amount will not affect the flavor. Do not settle for below average scrambled eggs when you can achieve restaurant-level scramble.
Making Scrambled Eggs
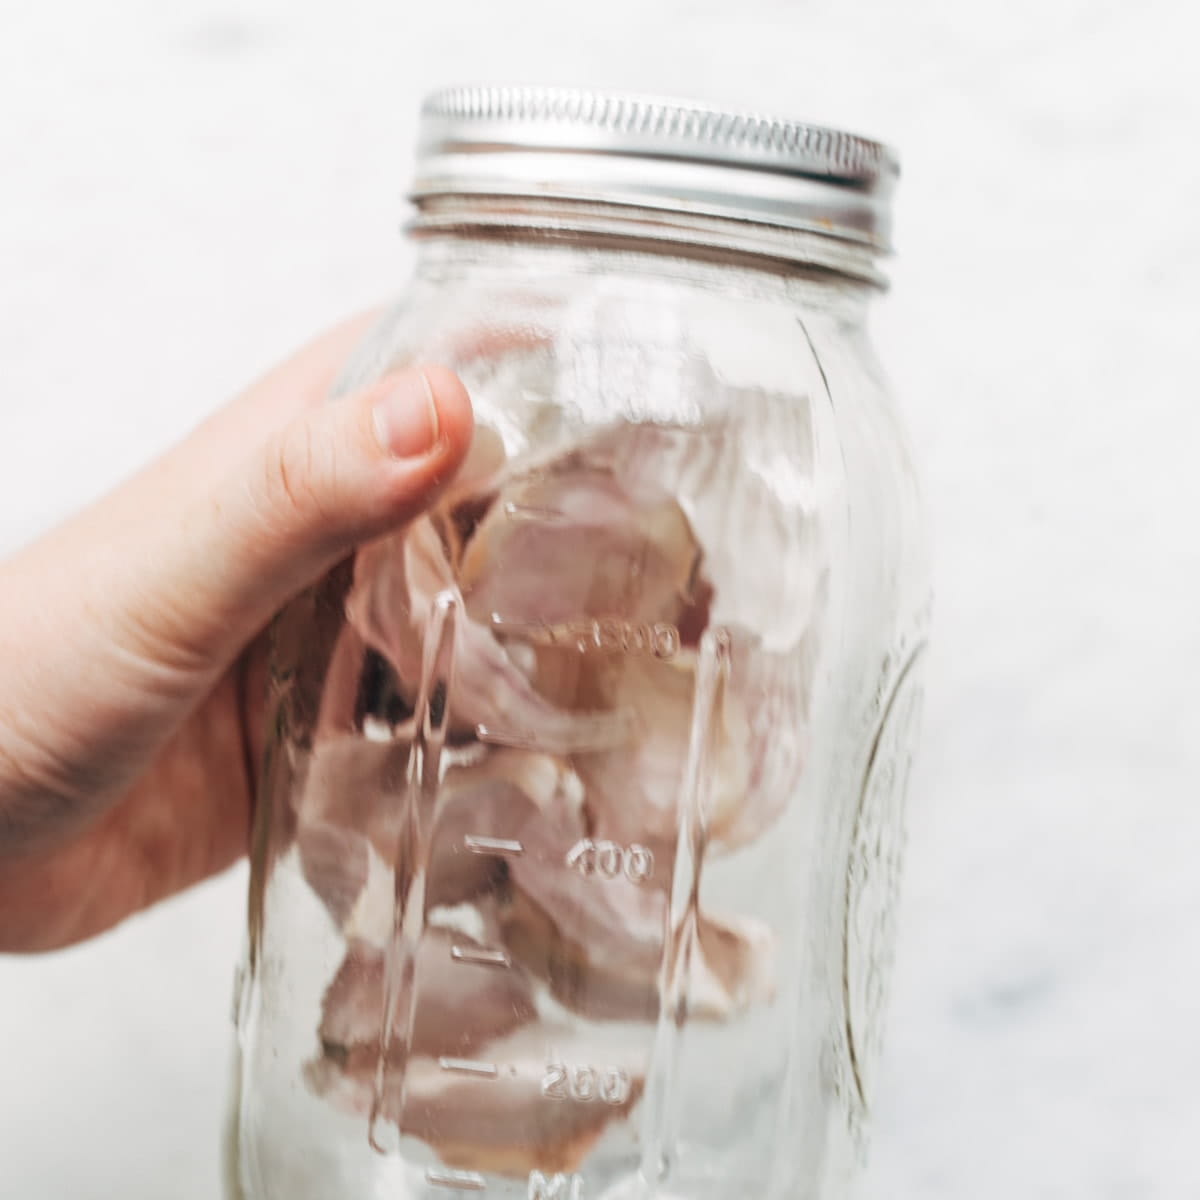
Peeling Garlic Cloves
Before you can use each clove of garlic, you need to take off its skin first. The process isn’t necessarily difficult, but it can get messy and frustrating, especially if you need many cloves. Simplify your garlic peeling. Pop each clove in a jar, screw the lid on, shake the jar heartily and rattle the cloves around for a few seconds. When you do this, the skin will slide off and you will be left with clean cloves that are ready for mincing.
Peeling Garlic Cloves
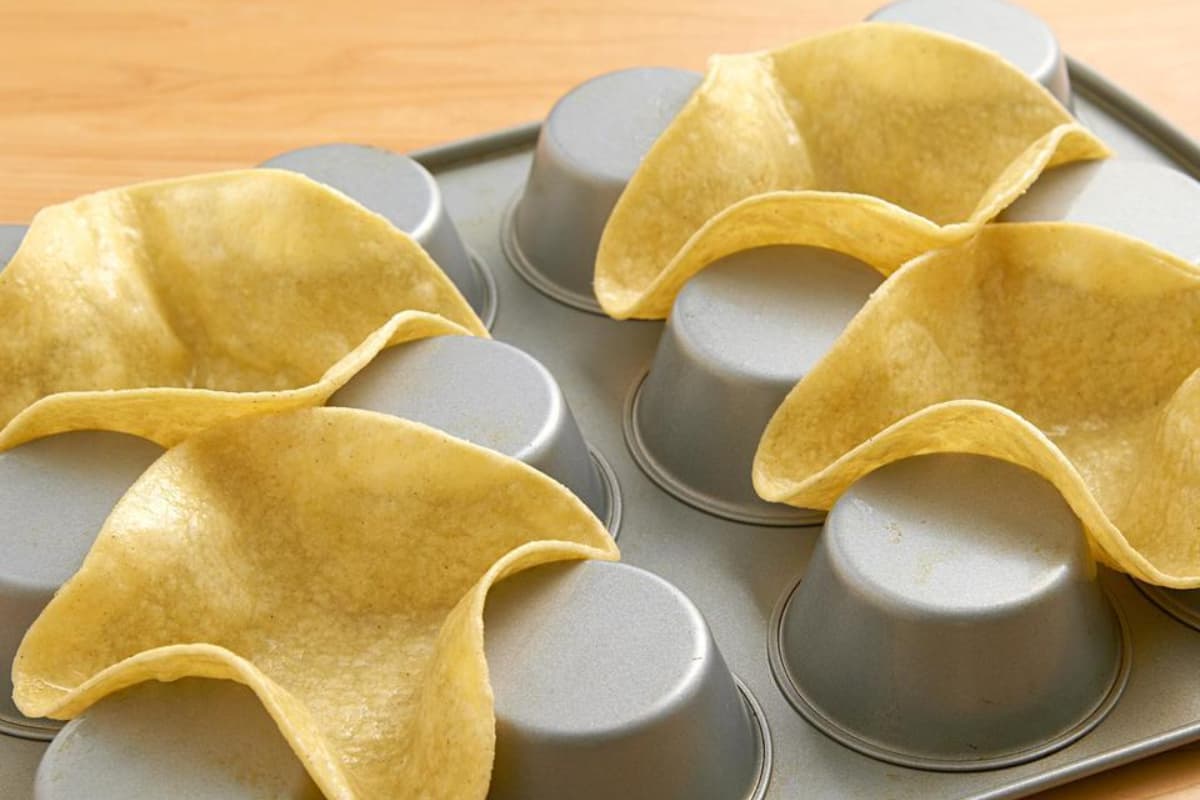
Making Burrito Bowls
For those who often eat at home, you are probably on the lookout for new and innovative foods which differ from your usual dish. However, there is something you will never get tired of – crunchy and delicious burrito bowls. You need corn tortillas and a muffin tin for this trick. Flip the muffin tin and form a corn tortilla into a bowl in the middle of four of the cavities. Bake the corn tortillas at 375 degrees for about 10 minutes. When they are finished, you will have crispy bowls that are ready to be filled with burrito fixings.
Making Burrito Bowls
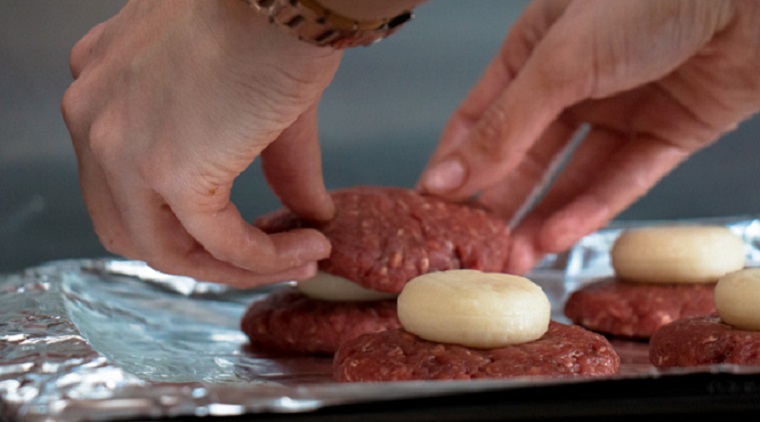
Adding Cheese To Burgers
Practically everyone likes cheese. And nothing is better than cheese in hamburgers to add a bit of flavor. However, the days when you simply added cheese slices to a burger right before you eat it are over! Put a piece of Babybel cheese in the middle of your meatball so that the cheese melts in the center when you cook the meatball. This will result in a burger that is so much more flavorful and delicious! This method of adding cheese to your burger is really simple and effective.
Adding Cheese To Burgers
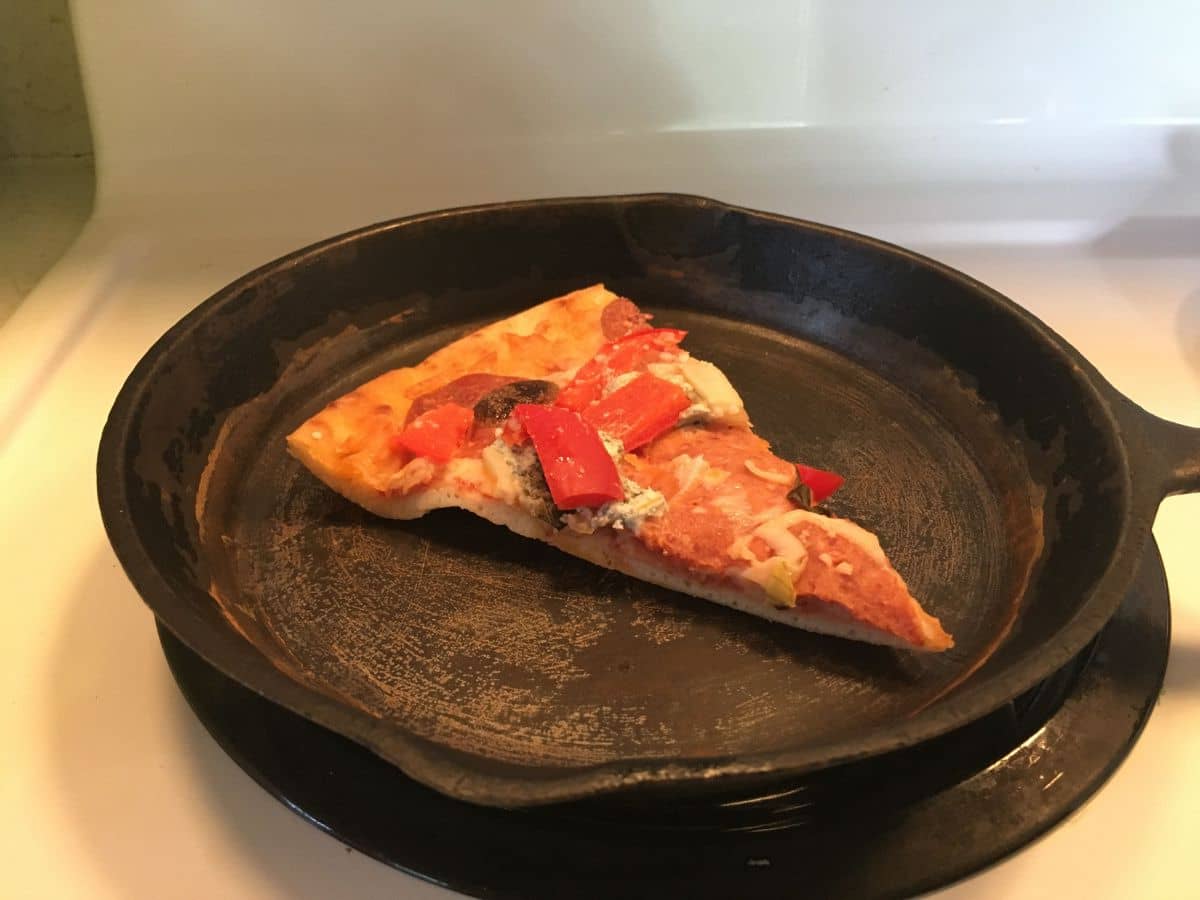
Reheating Pizza
For evenings when you don’t want to cook, pizza is definitely the ultimate delivery food. If you’re lucky, you’ll have a lot of leftovers that might last for several days. There are people who enjoy cold pizza, but others prefer popping their slice in the microwave, resulting in a mushy crust which ruins the flavor of the pizza. Say goodbye to subpar second-day pizza by using a skillet to reheat your slice. With this method, the crust remains crunchy, the cheese melts and the sauce is heated. You will have a delicious slice which is as good as your first-day pizza.
Reheating Pizza
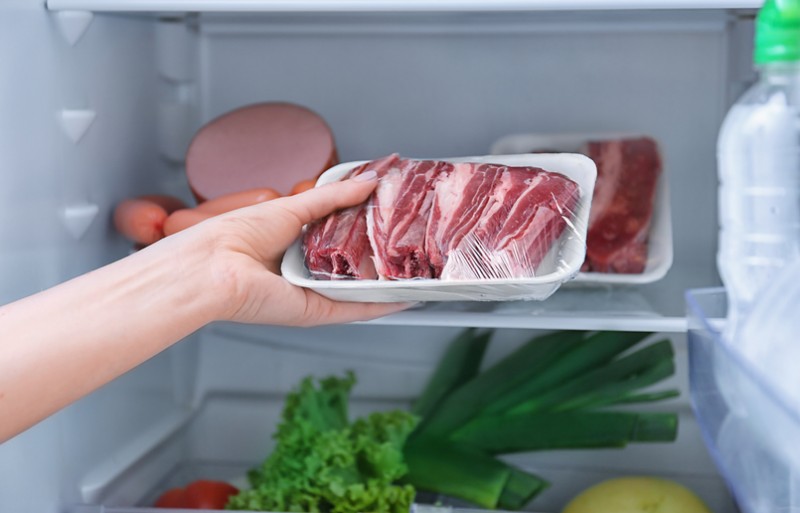
Slicing Meat
You may have noticed that the texture of fresh meat is not really good for precise slicing. Thin portions or rough cubes can be achieved, but creating uniform cuts or slicing thin, sandwich-friendly pieces off the top is not possible for many home chefs. To deal with this issue, put the meat in the freezer prior to slicing. Do not let the meat get too hard—around 15 minutes should be enough. When the meat is a bit colder, it will be much easier to slice. The meat will be chilled enough for precise cuts but can still be tossed onto the skillet.
Slicing Meat
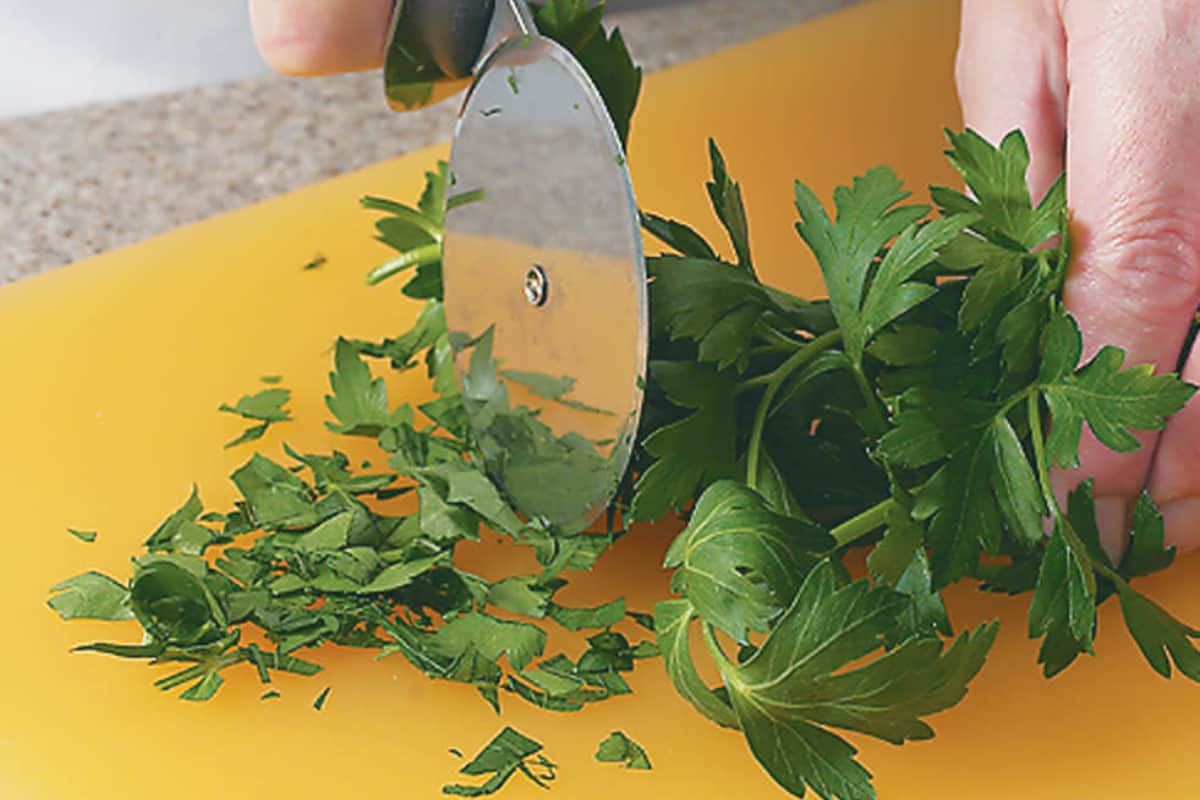
Cutting Herbs
Knives are great for slicing through veggies, but it takes a bit more work to cut herbs. You may have noticed that using a knife on these greens often results in a mushy mess instead of fresh herbs which can be tossed into your dish. To simplify the process, use a pizza cutter to cut your herbs. After laying your greens on a cutting board, run the cutter over them. The pizza cutter will slice through them, producing cleaner lines than what you normally get with a knife. Run the cutter over the herbs a few times, and then add them to your dish for a bit more flavor.
Cutting Herbs
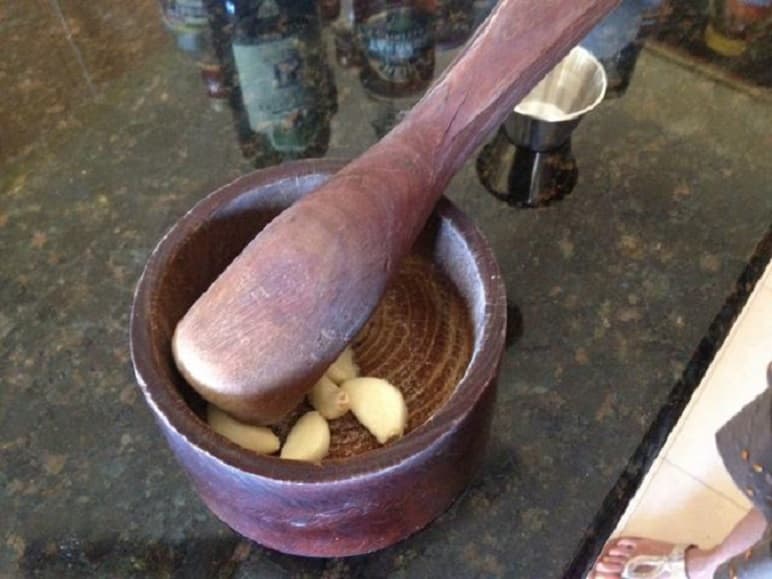
Mincing Garlic
So many recipes have minced garlic as a flavor foundation. However, using a knife alone to get garlic into tiny pieces is not easy. You often have to stand over the cutting board for a while and slice the same clove many times. You can make the process of mincing garlic easier by using a mortar and pestle. Before grinding the cloves into a paste, cut them first into smaller pieces. This way you will use fresh garlic but with the pre-packaged mince consistency. You can have that subtle flavor boost in your food without the risk of having a too-large bit of garlic that you might bite into.
Mincing Garlic
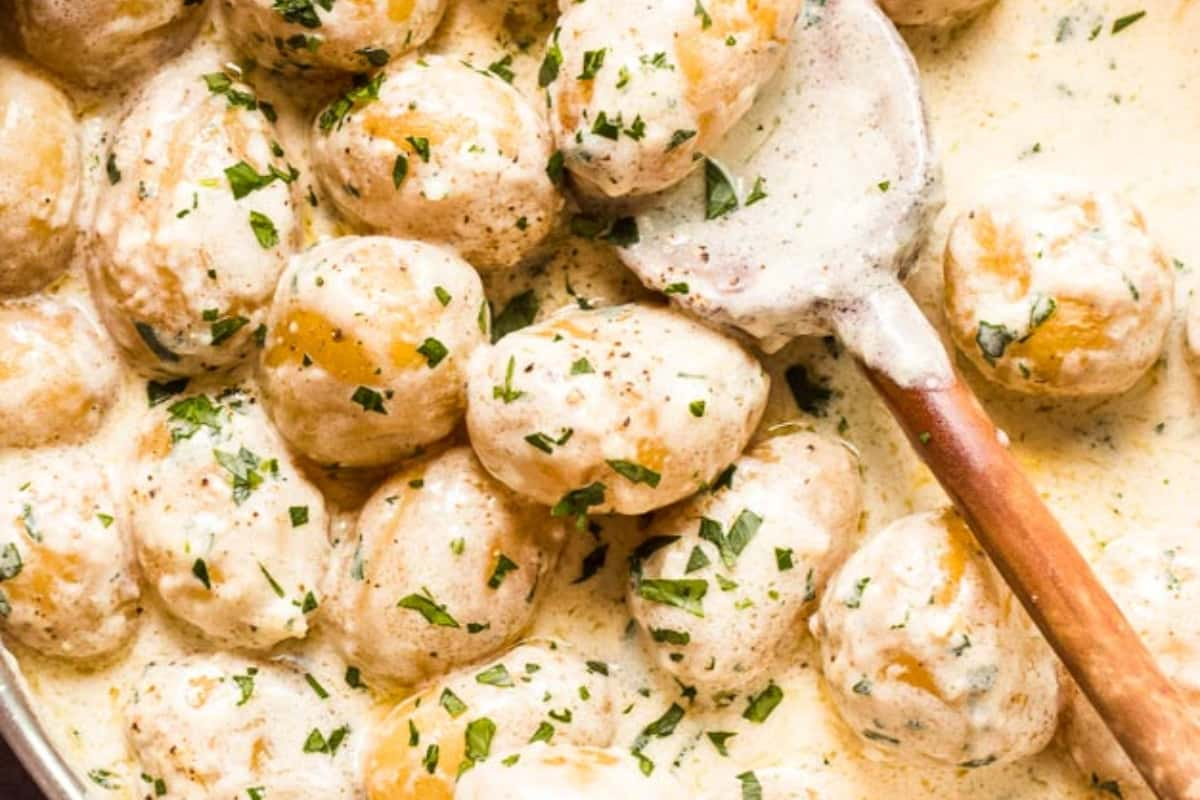
Making Mashed Potatoes
This cooking trick is for those who want an extra-decadent meal. For mashed potatoes, try cooking the spuds in heavy cream instead of water. Take the potatoes out of the cream, mashed them, and add that same cream to the dish instead of using milk. You don’t want creamy potatoes every night. However, if you are thinking of going all out, this trick will surely give you richer and more flavorful potatoes.
Making Mashed Potatoes
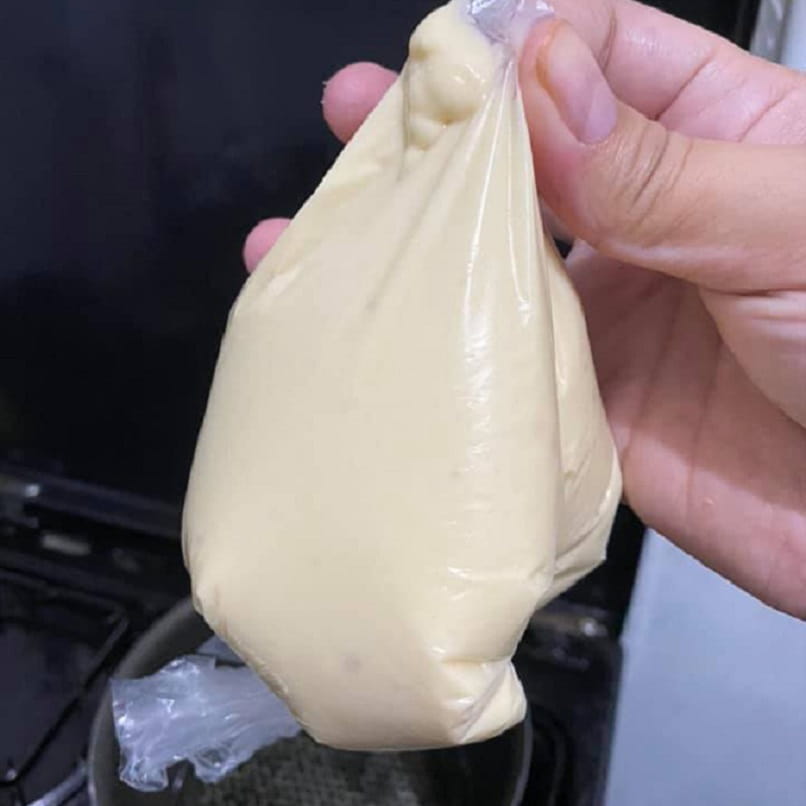
Making Pancakes
Pancakes are perfect for breakfast, but after mixing the batter, you still face the task of ladling the batter onto the skillet. That is where things get messy normally, resulting in pancakes that do not look like the ones restaurants serve. For quicker and easier pancakes, place your batter in a large plastic bag and cut a hole in one corner of the plastic. Use it like you would a piping bag. This way it is easier to swirl it into your skillet and you have more control over how much batter you use for each pancake. You will end up with perfectly shaped pancakes without wasting any batter.
Making Pancakes
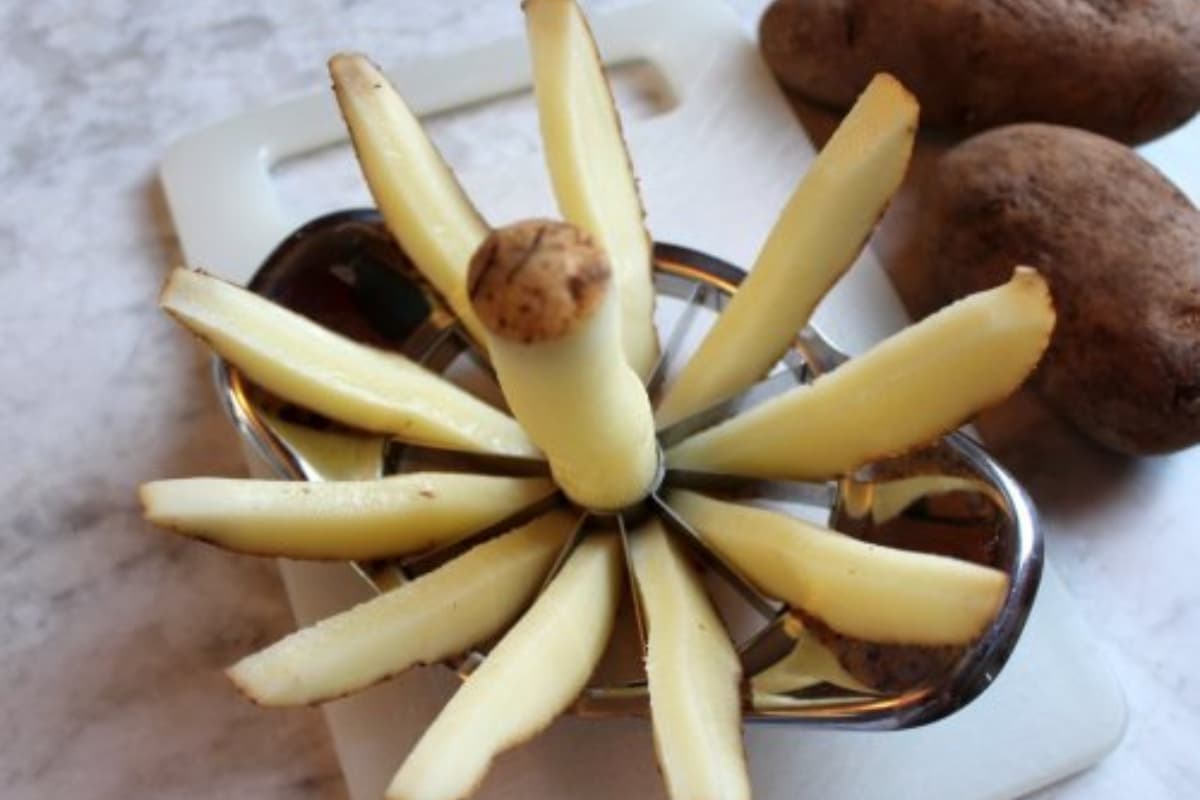
Cutting Fries
While making homemade fries is appealing, it is often more time consuming than just ordering them from a nearby restaurant. You can actually make crunchy potatoes from scratch using an apple slicer. Slice off one end of your potato and make it stand on a hard surface. Push down the apple slicer over the potato to create perfect and even wedges. In seconds you will have potato wedges which simply need to be fried or baked to crispy perfection. It is easy to make your own fries.
Cutting Fries
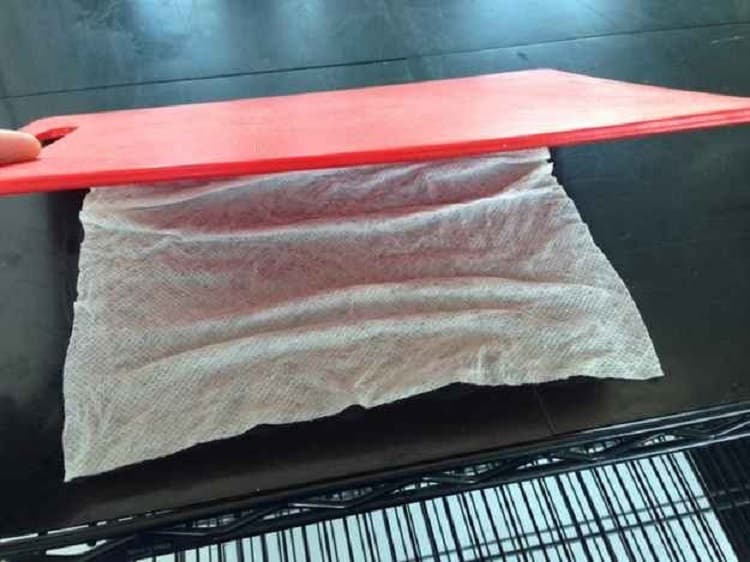
Keeping Bowls And Cutting Boards From Slipping
It can be frustrating when you are preparing something in the kitchen but all your tools keep slipping and sliding on the counter. Whether you are trying to slice on a cutting board that won’t stay put or trying to mix in a bowl that tries to get away from you, creating a bit of traction on the counter will enable easier cooking. Place a paper towel or a dish towel under your cutting boards and bowls to stop them from sliding around. To keep your tools from getting away from you, the towel should be a bit damp so that it will cling to the counter.
Keeping Bowls And Cutting Boards From Slipping
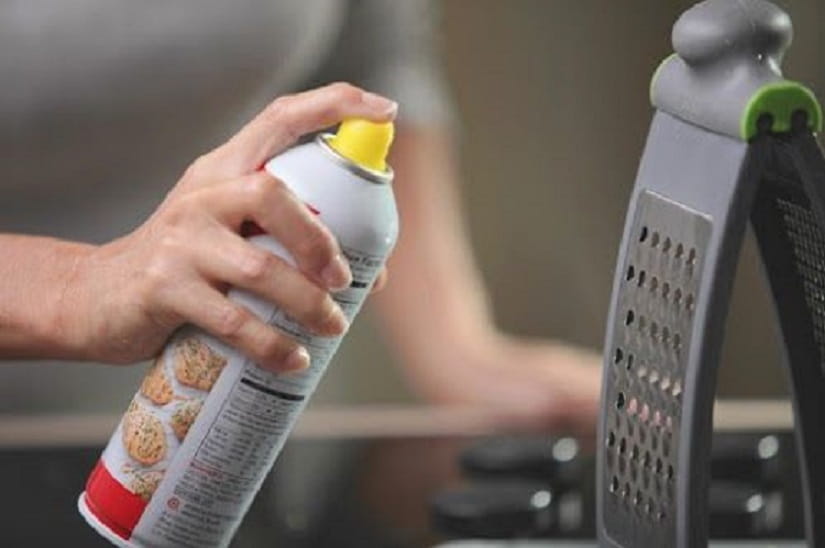
Grating Cheese
Do you dread grating cheese because you have to use the cheese grater? While the kitchen utensil is not really difficult to use, it can be hard to clean if the cheese gets caught in all the nooks and crannies. Before using the cheese grater, spray a little bit of cooking spray on it. The cheese will not stick on the grater because of the cooking spray, which makes the process of shredding the cheese and cleaning up after faster. Your cheese grater frustrations become a thing of the past when you use this trick.
Grating Cheese
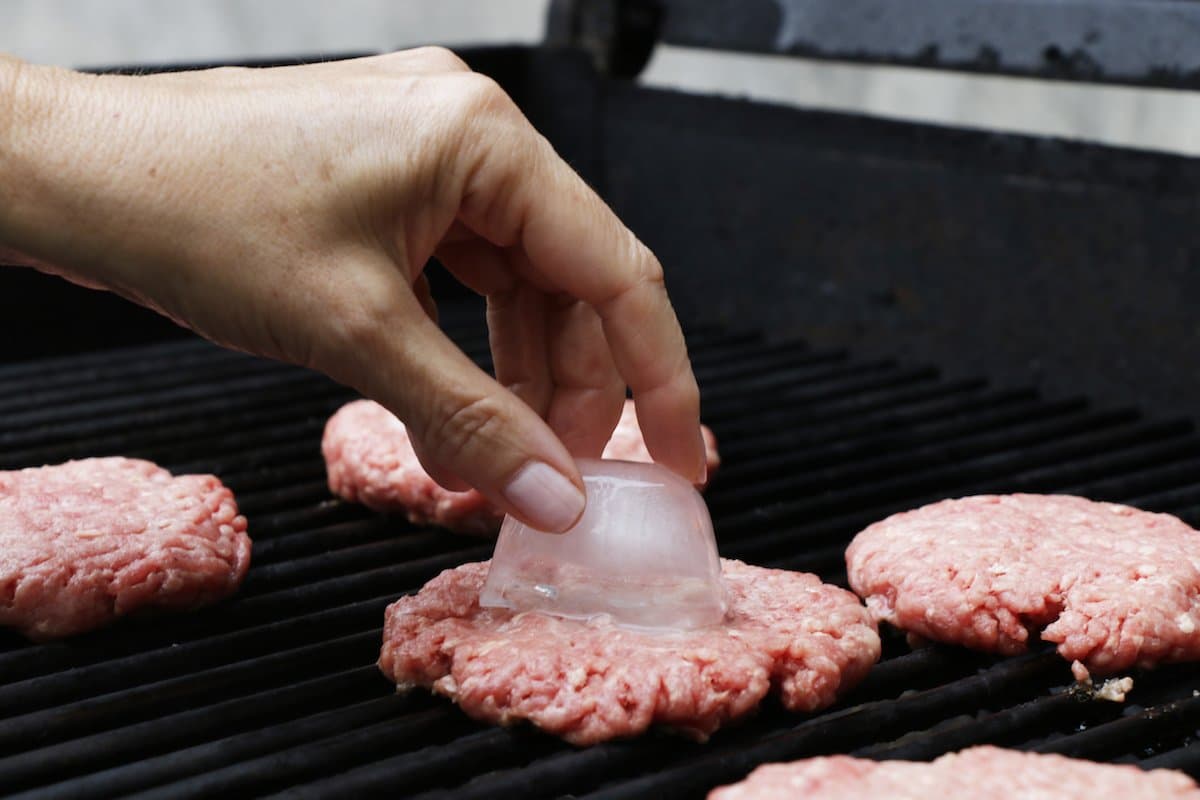
Grilling Burgers
When they grill burgers at home, even good cooks can find it hard to keep burgers juicy and nice while cooking the ground beef fully. An ice cube might actually provide the perfect solution. Place an ice cube in the middle of each burger patty and toss the burgers on the grill. Cook them like you normally would. While the patty is cooking, the ice melts into it, keeping your meat juicy and nice. With this trick, you will never have to eat dry burgers again.
Grilling Burgers
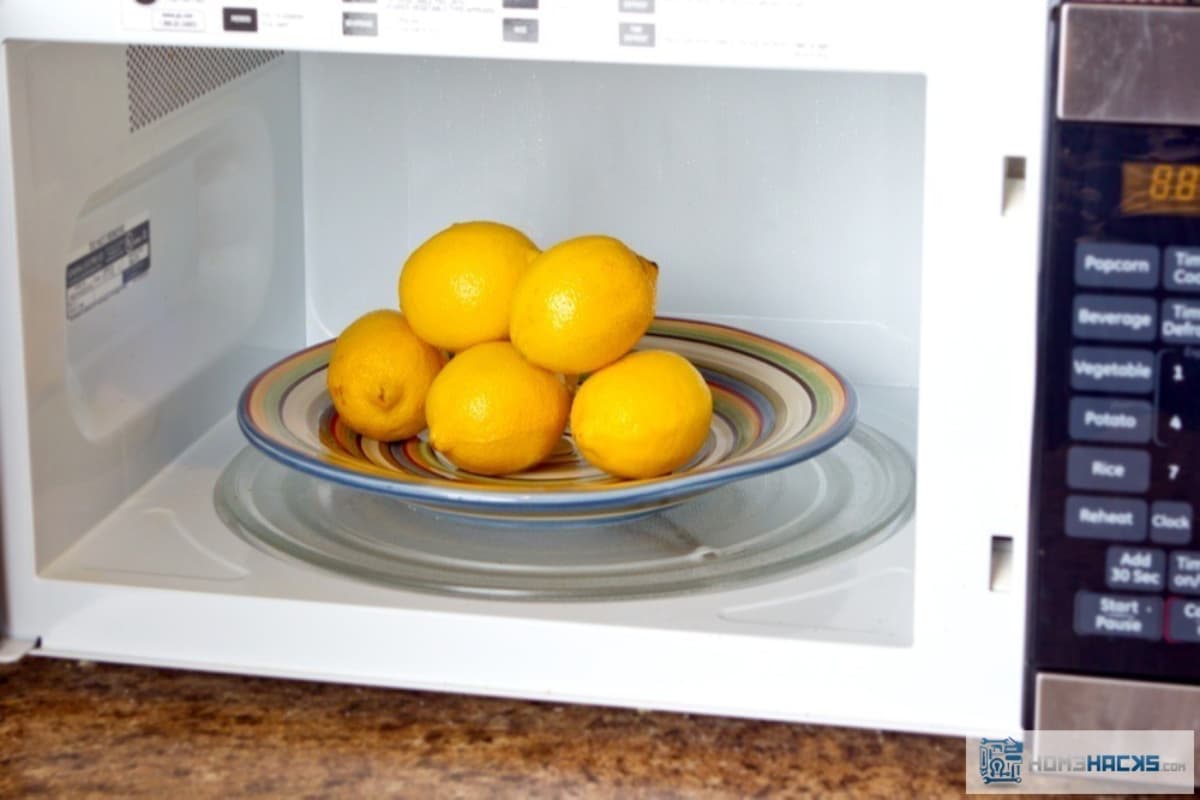
Juicing A Lemon
It is not always easy to juice a lemon. Sometimes it requires some serious muscle but you still end up with just a bit of lemon juice — the output isn’t worth the effort. Before juicing your next lemon, microwave it for seven to ten seconds. After this, roll the lemon across the counter, applying a bit of pressure. Cut the lemon and juice it like you normally would. When you follow this method, you should get more juice with considerably less effort.
Juicing A Lemon
Removing The Stem Of A Strawberry
If you use fresh strawberries in making a dish, removing the stems from the berries can be frustrating and time-consuming. Simplify the process by using a plastic straw. Push the straw inside the pointy end of the strawberry through the center until its stem pops out. You will have a whole strawberry for cooking but the stem removal is significantly easier compared to using a knife and cutting every strawberry.

Removing The Stem Of A Strawberry
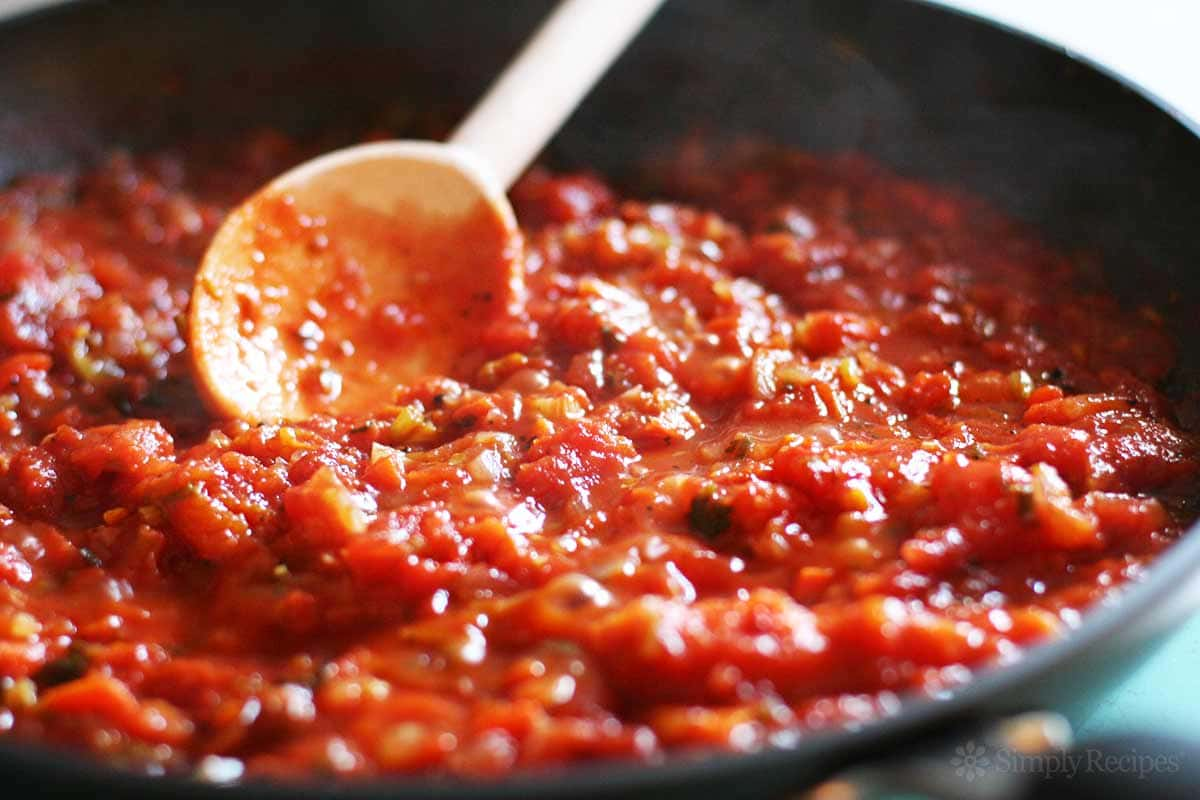
Fixing Tomato Sauce
Tomato sauce that has been sitting in the fridge for a while gets a bit acidic. While it could still be used in a dish, the flavor will be less appealing compared to fresh tomato sauce. Thankfully, it does not have to be thrown away. Peel a carrot and put it in a pan with the sauce. Simmer for a couple of minutes until the sauce is heated all the way through, and take the carrot out before serving. The carrot adds some sweetness which helps tone down the acidity from the tomato sauce.
Fixing Tomato Sauce
Cooking Fish
You can definitely put your fish right on the grill and prepare a quick dinner, but there are a couple of benefits to using parchment paper when cooking fish. When the fillets are inside individual packets, they will soak up the flavor that you put in the parchment. The next time you make a fish dish, wrap the fillet in parchment paper with seasonings and vegetables. This method will ensure a quicker clean-up and give you single-serving packets bursting with flavor.
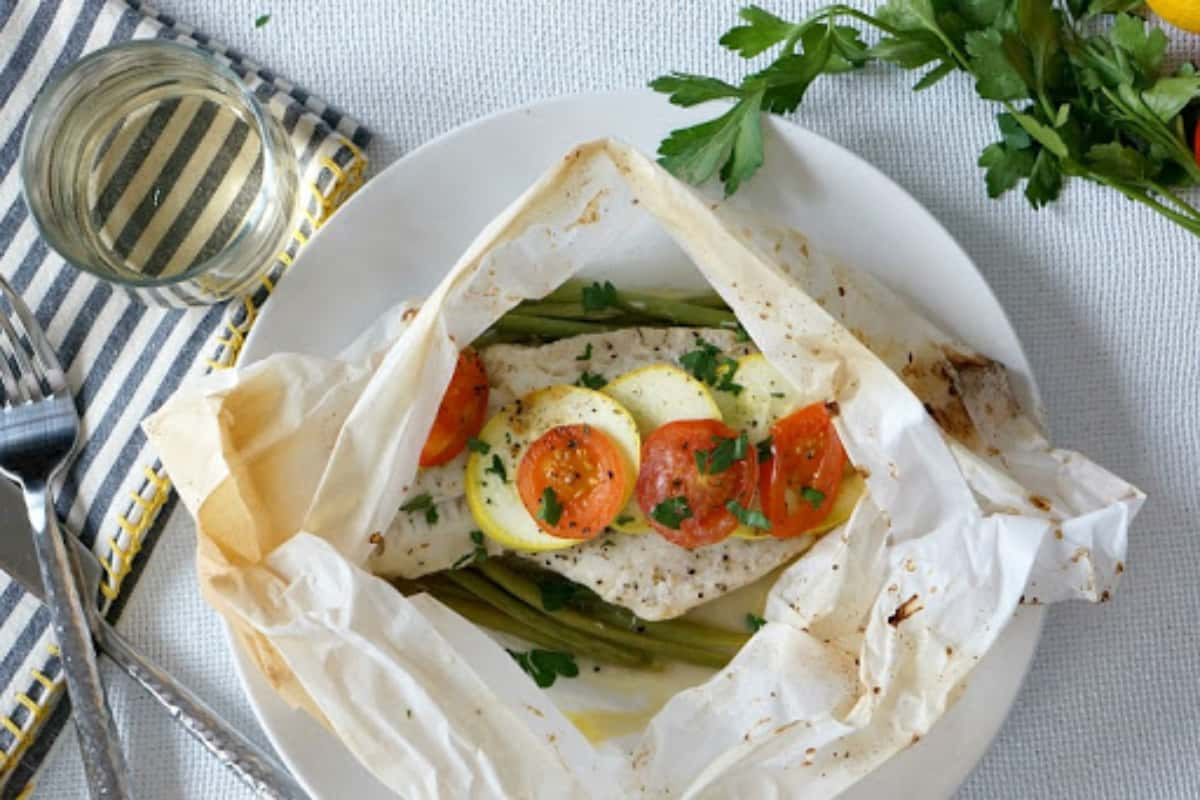
Cooking Fish
Storing Herbs
When you buy some herbs from the store, it is likely that you won’t use the whole bunch at once. However, if you leave them in the fridge, herbs have the tendency to go bad before you have the need to use them again. Try storing your herbs a little differently rather than watching them waste away. Take the bunch of herbs, trim off the stems, and put the whole bunch in a glass of water. Then, cover the top part with a plastic bag. Put the herbs in the fridge or just leave them on the counter. The leaves will stay fresh leaves weeks instead of days.
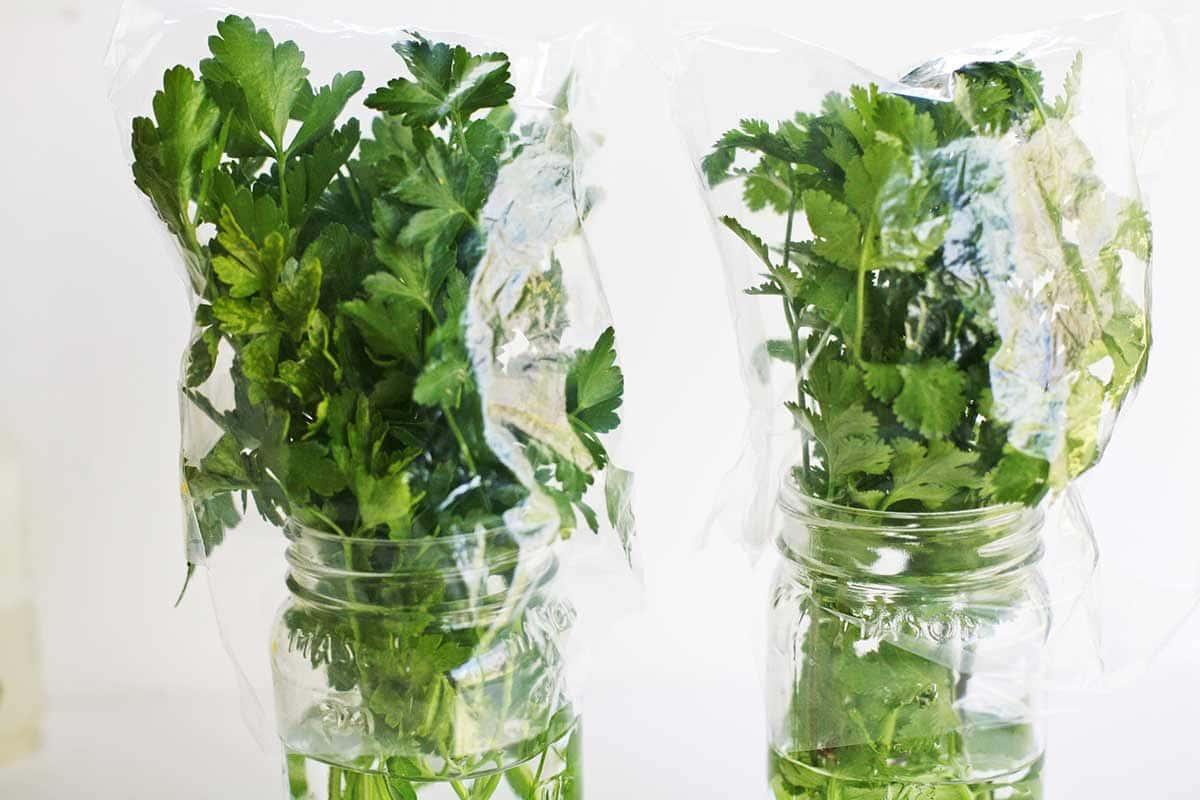
Storing Herbs
Roasting Chicken
To roast chicken perfectly, Chef Daniel Boulud says you should mix about 1/2 cup of sugar, 1/2 cup of honey, and 3/4 cup of salt in one gallon of water which you will boil, and then let it come back to room temperature. Soak the whole chicken in the mixture, cover and put in the fridge for 18 hours. Then, put the chicken on a roasting rack and let it dry in the fridge, uncovered, for around 12 hours. When the chicken is dry, add the spices, and then put it in the oven that has been preheated to 425°F. Roast the skin for 15 minutes, and then cook the chicken at 350°F for around 20 minutes.
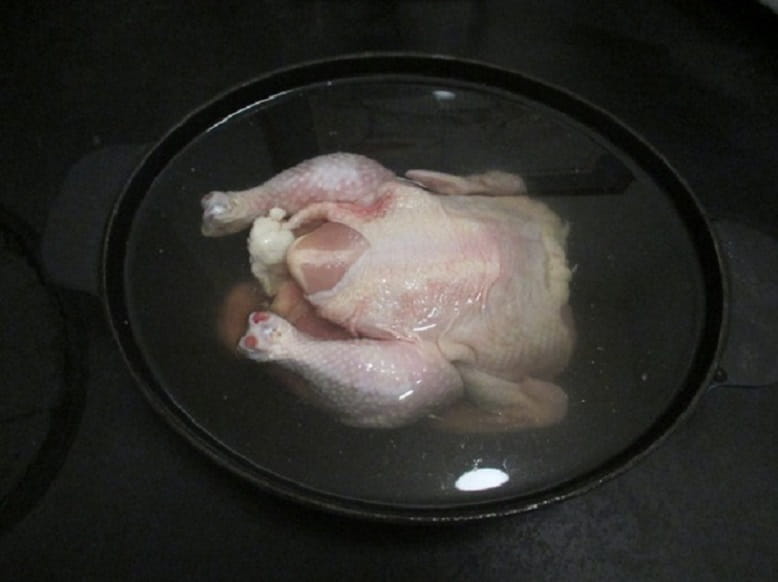
Roasting Chicken
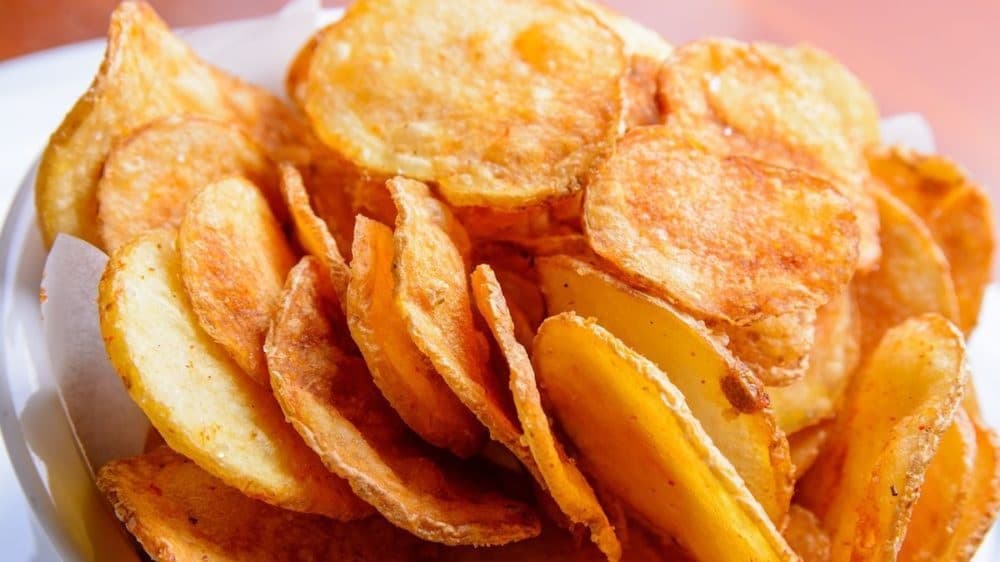
Cooking Potato Chips
Getting potato chips right is actually not that easy! First, cut your potatoes about 1/8 inch thick to get good crispy chips. In a large bowl, cover the potatoes with cold water to rinse. Next, drain and add 6 cups of water and half a cup of white vinegar, which will make them crispy! Soak the potatoes for half an hour to 2 hours, and then drain and dry. In a medium-sized pot, pour about 4 inches of oil and heat to 300°. Fry the potato chips and turn them regularly for about 5 minutes or until they are crispy golden and brown. Season the chips to your liking!
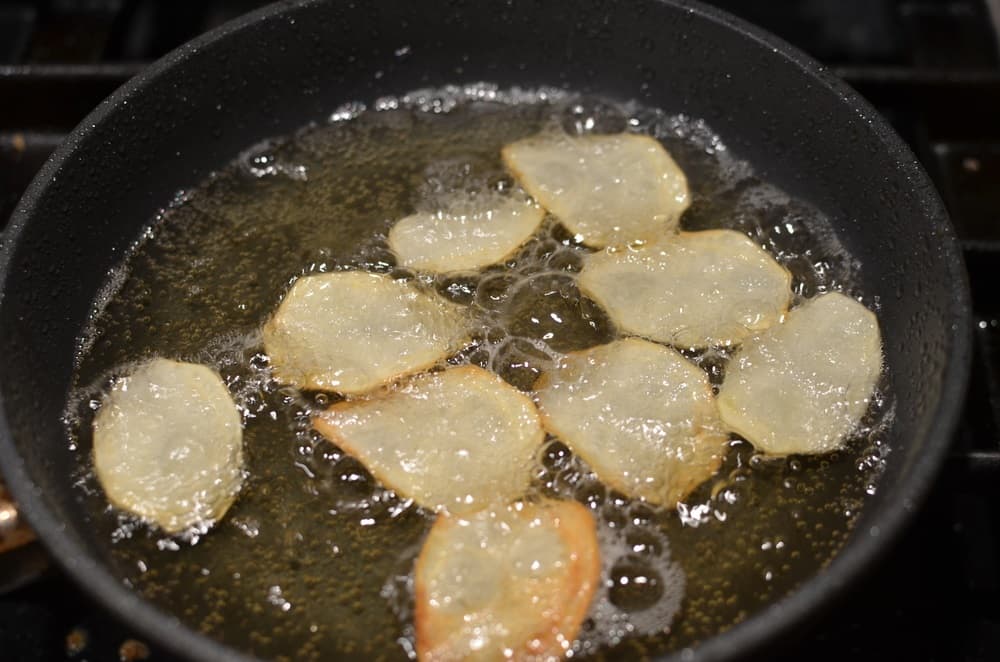
Cooking Potato Chips
Storing Peanut Butter
The oil in natural peanut butter often collects at the top because natural nut butter does not contain stabilizers that keep the peanut oil and the butter from separating. You might find it annoying having to stir the oil every time you want to have some peanut butter but folks at Reader’s Digest have a handy tip that needs zero elbow grease. Since liquids have the tendency to rise, store your jar of peanut butter upside down to keep the oil from separating. Just rotate the jar after you use it.
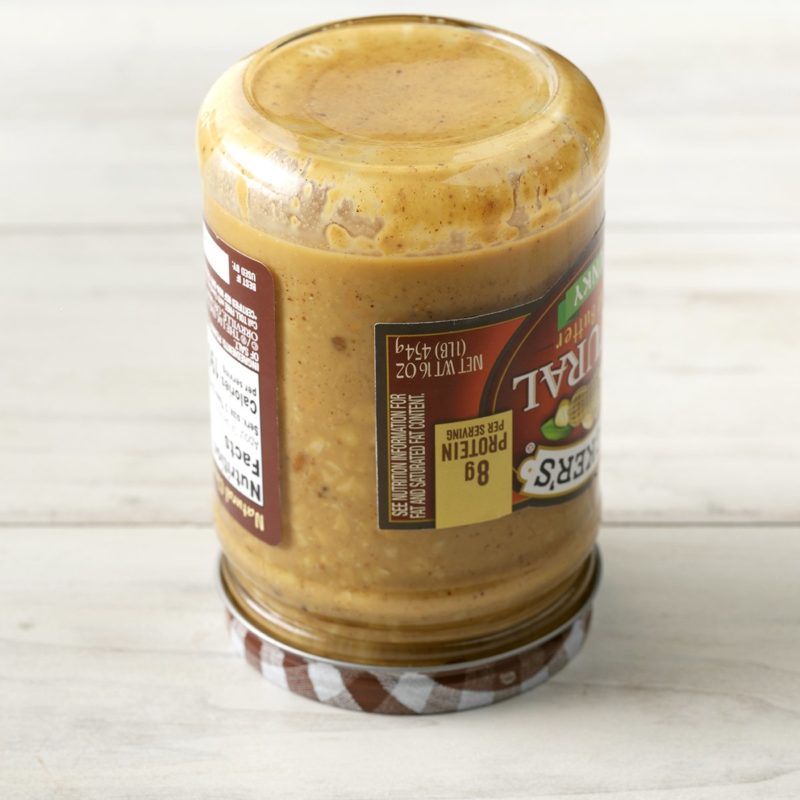
Storing Peanut Butter
Shredding Chicken
A common way to shred chicken is by using two forks, but this can take a lot of time and the chicken doesn’t always get shredded uniformly. Shredding chicken can be made easier and faster by following a smart hint offered by the cooks at Food.com. In the bowl of a stand mixer, place the boneless chicken. Using the paddle attachments, set the mixer at low speed and let it run for a few minutes. A hand mixer can also be used but make sure you break the chicken up prior to mixing.
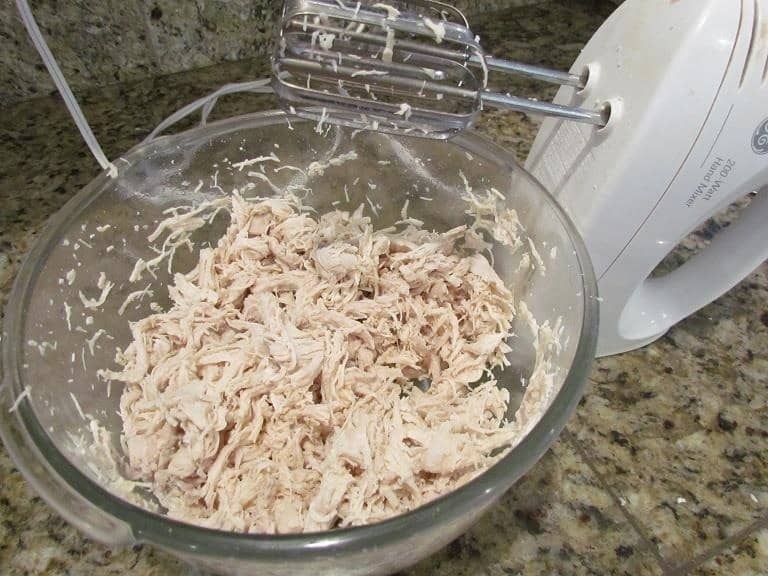
Shredding Chicken
Slicing Soft Foods
One unexpected tool that you should have in your kitchen is dental floss. It will save you a lot of time and is quite useful in slicing soft foods. It makes the process easier and produces a nice clean line. You can use dental floss in cutting dough, cheese, and even watermelon, and many bakers use this trick to cut cakes into layers. Just make sure you get non-flavored floss so you won’t accidentally add some minty flavor to the food you are slicing.

Slicing Soft Foods
Saving Salty Soup
There are times when we get a bit overzealous with the salt when making soup. Over-salting food while cooking can be frustrating, but one hack can help you rescue that pot of soup. This perfect tip for correcting salty flavors is courtesy of Taste of Home. One contributor wrote, “Toss in a few wedges of raw apple or potato. Simmer for 10 minutes and discard the wedges to get the flavor back to normal.” This solution is simple but can save you money and time in the kitchen.
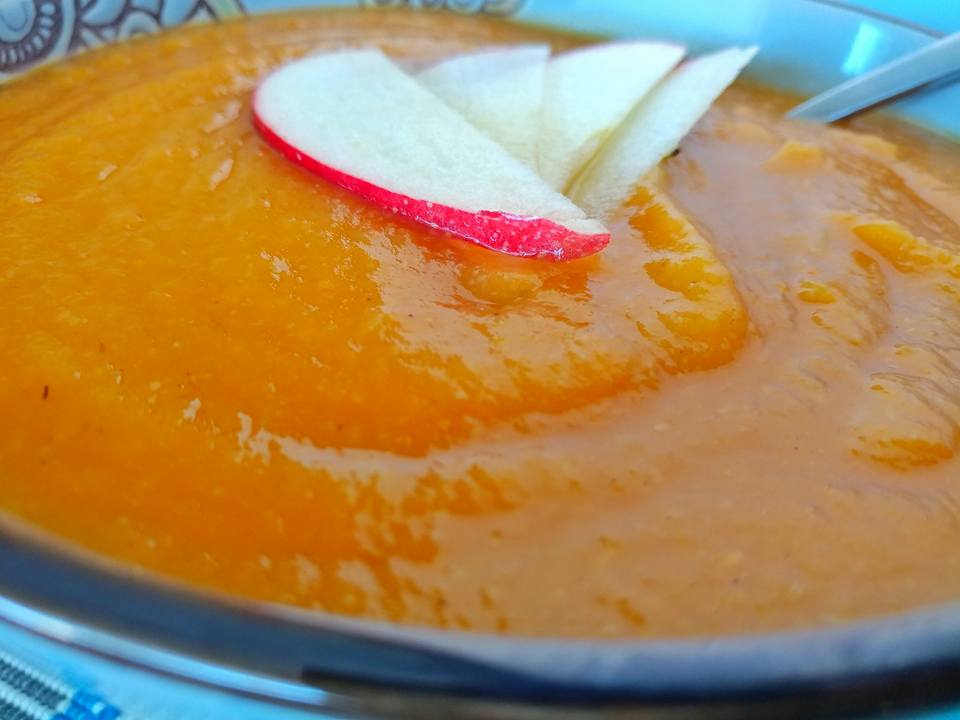
Saving Salty Soup
Making Moist Cookies
To make your chocolate chip cookies moist, there is one surprising ingredient that you can add. It will help you make the chewiest cookies which would satisfy even the pickiest palate. Adding milk powder to recipes can make your baking much better. This tip is not only for cookies but also for making pie crusts more golden. Milk Bar founder and chef Christina Tosi told The Kitchn, ”My hidden secret ingredient to make everything taste better is a tablespoon of nonfat milk powder.” She added, “It just makes everything taste so much better!”
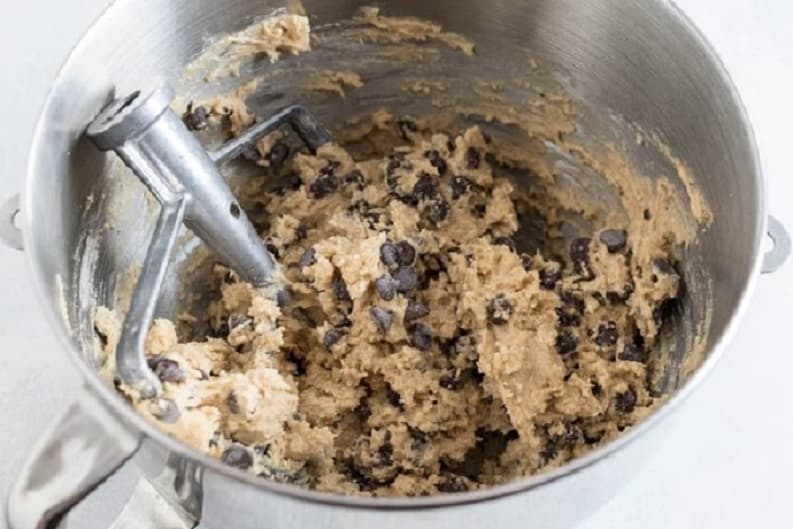
Making Moist Cookies
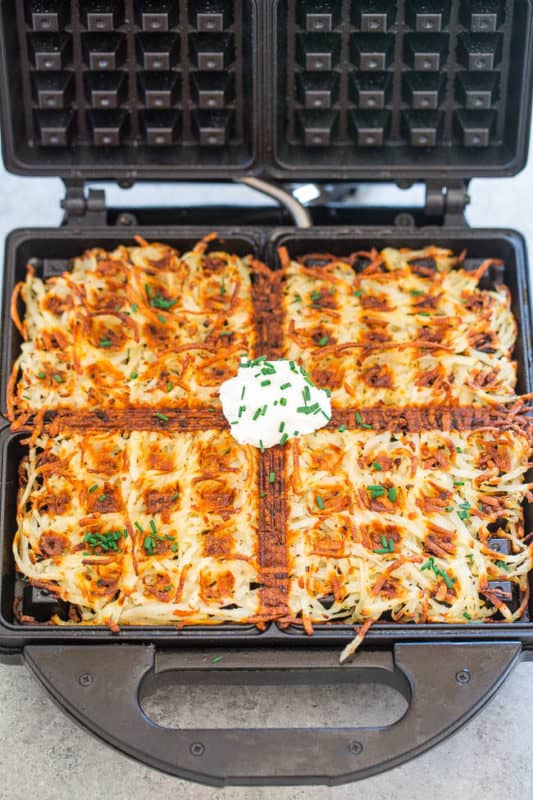
Making The Perfect Hash Brown
This next tip is for all the fans of brunch. You can dress up your meal in a simple way by making hash browns using a waffle iron. The potatoes come out so much crunchier as the iron steams them to perfection. Cook time is streamlined by this process and the potato waffle will be silky smooth inside. You can use frozen hash brown rounds, fresh potatoes, or even tater tots. Get creative and throw in some onions to the mix. There are endless possibilities and you will impress your brunch guests with your incredible hash brown-making skills.
Making The Perfect Hash Brown
Keeping Greens Longer
Sometimes, before we have time to eat the greens that we buy, they have already died. Placing them in the fridge will extend their life, but there is another better trick that will let you keep your cilantro or lettuce for up to three weeks! Do not take out your greens from the bag you bought them. Squeeze the bag well to remove the air from it, and then exhale into the bag to re-inflate it. The CO2 will help your greens last much longer!

Keeping Greens Longer